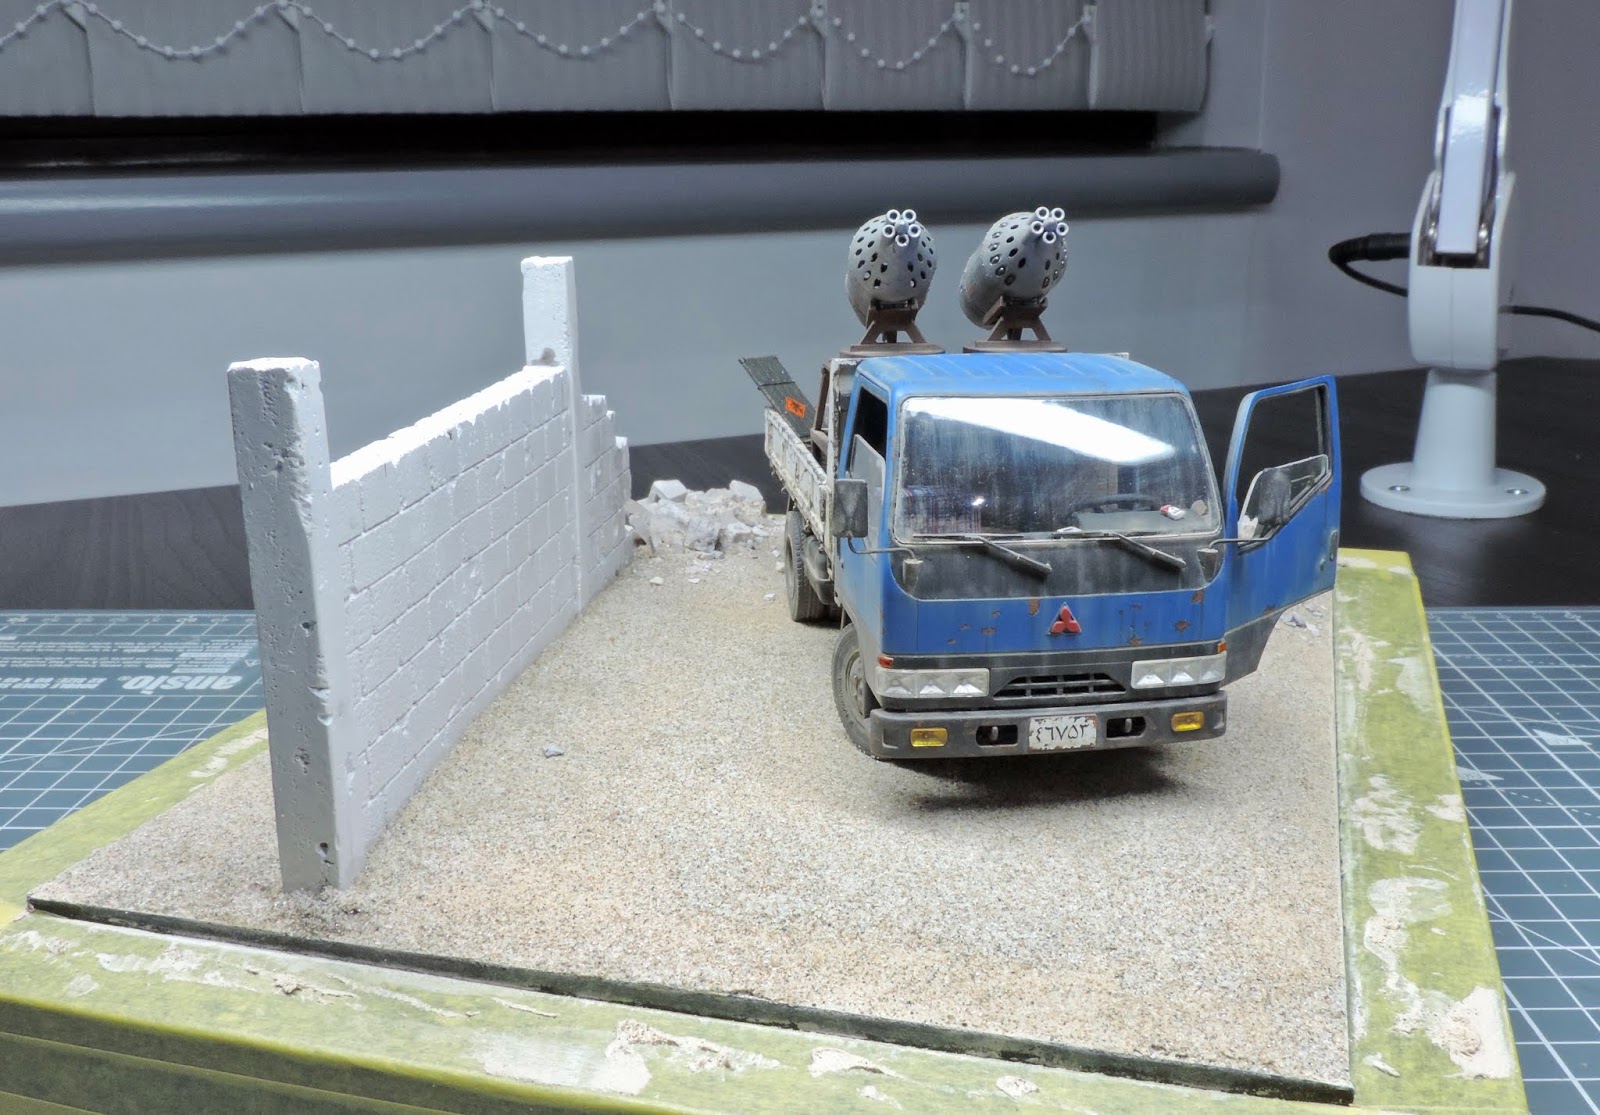
Not much to report today just a final dose of VMS sand & ballast freeze, just in case. I also fixed the wall sections in place and primed the figure. With the model in position I can see I have plenty of space against the wall to add loads of interesting rubbish and crap. There's also plenty of space behind the wall for more interesting rubbish to be stacked as well. So it's time to start making up tin cans, drinks cans and other assorted rubbish to furnish the base.
The base for the truck has now been started and here I've used my usual Ikea picture frame and foam board to build up the base. I then started work on the Red Zebra block wall sections. The rear of these sections is just plain plaster so I marked out the block pattern and then scored the mortar lines. The smaller section was also attacked to show a partially destroyed wall. I then added some plaster on the rears to show a bit of rendering.
Next some plaster was mixed up with a good dollop of VMS pva resin adhesive and a splash of yellow paint. This was then smoothed over the base and once almost dry fine sand was added and the plaster shaped using my fingers. The wall sections where then pressed into the groundwork.
Finally today some rubble was added again using Red Zebra rubble mix which is really good having a varied selection of bricks, blocks and concrete pieces as well as fine scatter and rebar. Everything then got a good dose of VMS sand & ballast freeze.
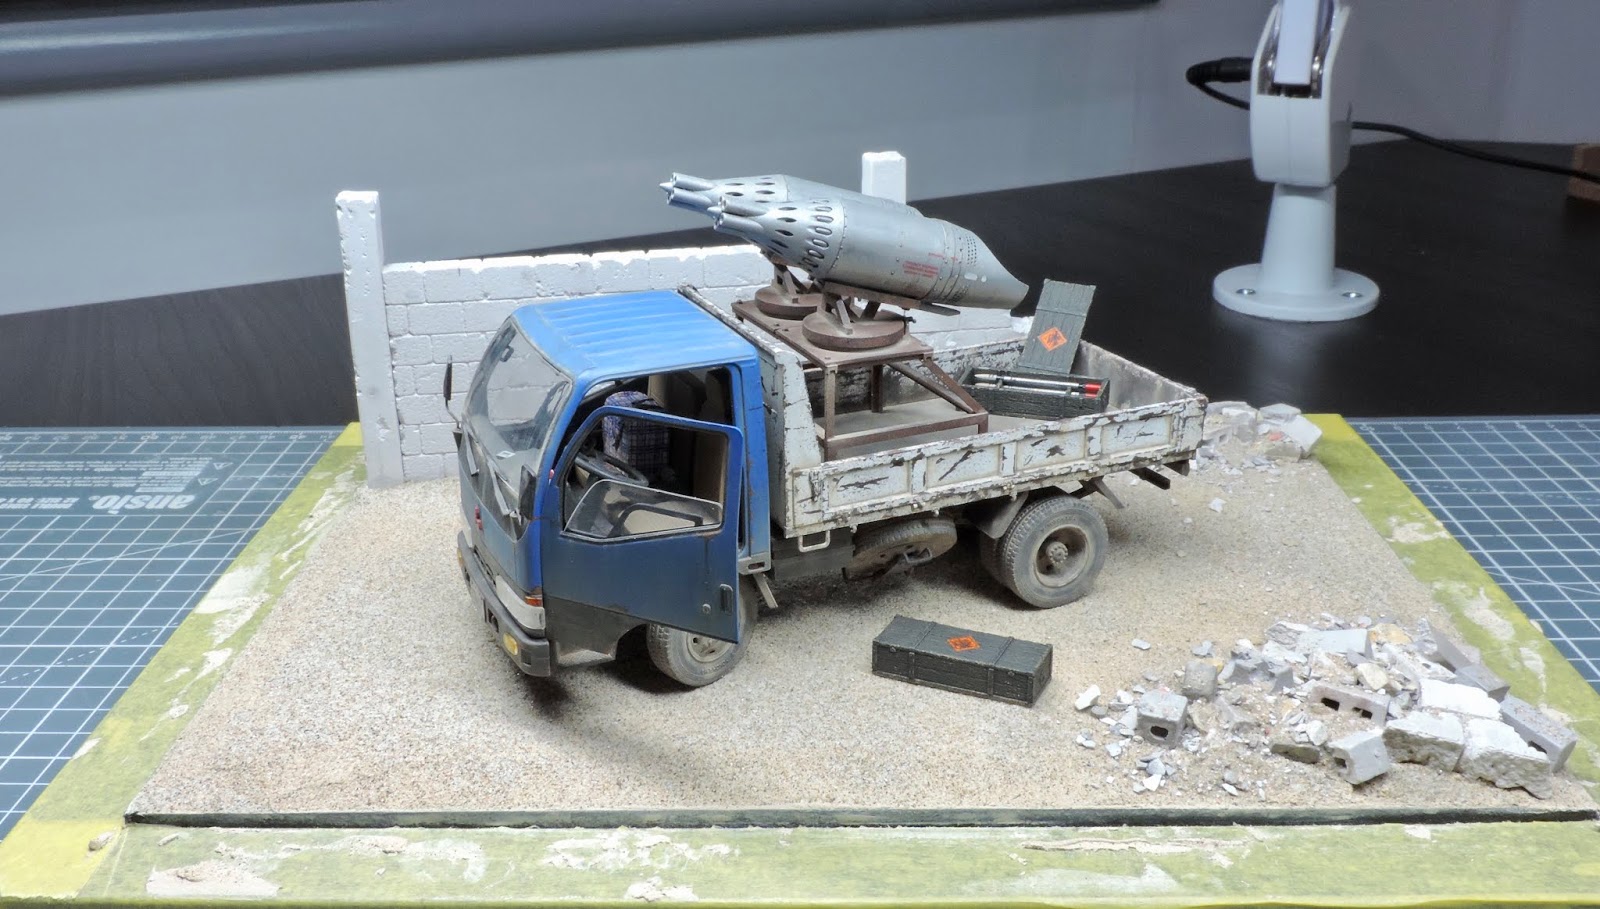
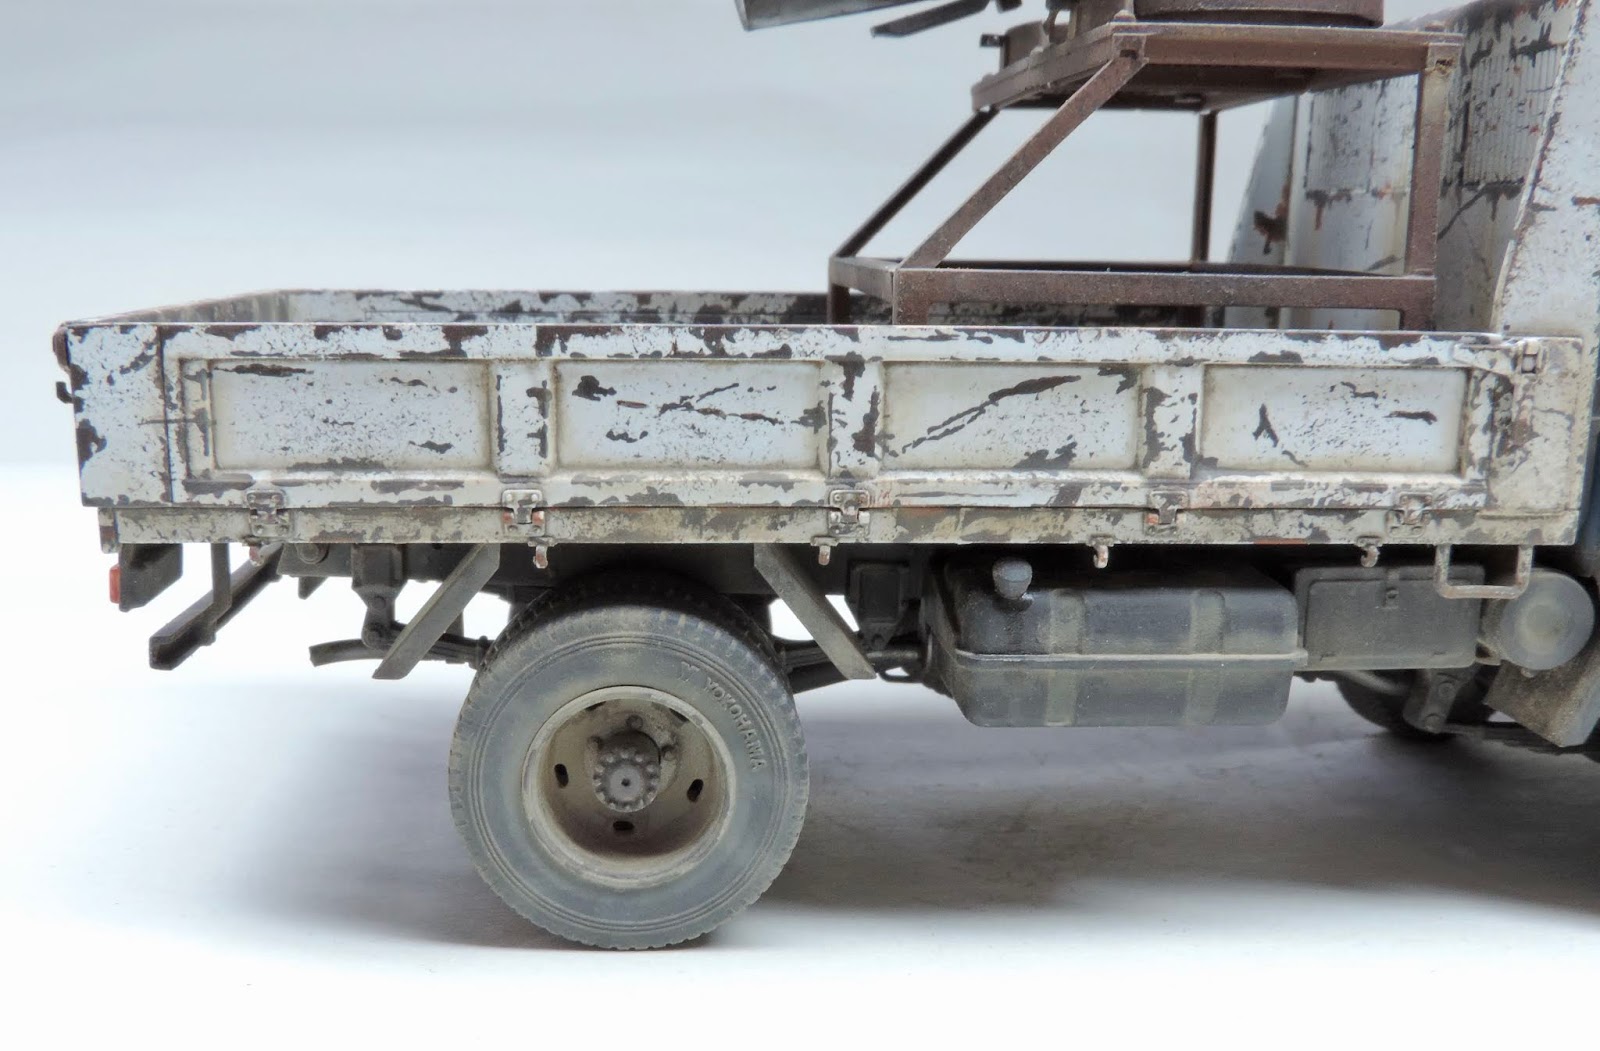
I've been having so much fun adding the pigments to the model I actually finished the final weathering in a day. I was so engrossed and enjoying it I just couldn't stop! Starting off with the chassis and undersides the VMS sand was used and this was blended in with a soft brush. Next the cab and rear bed sides received the same treatment including some streaking on the doors which worked really well.
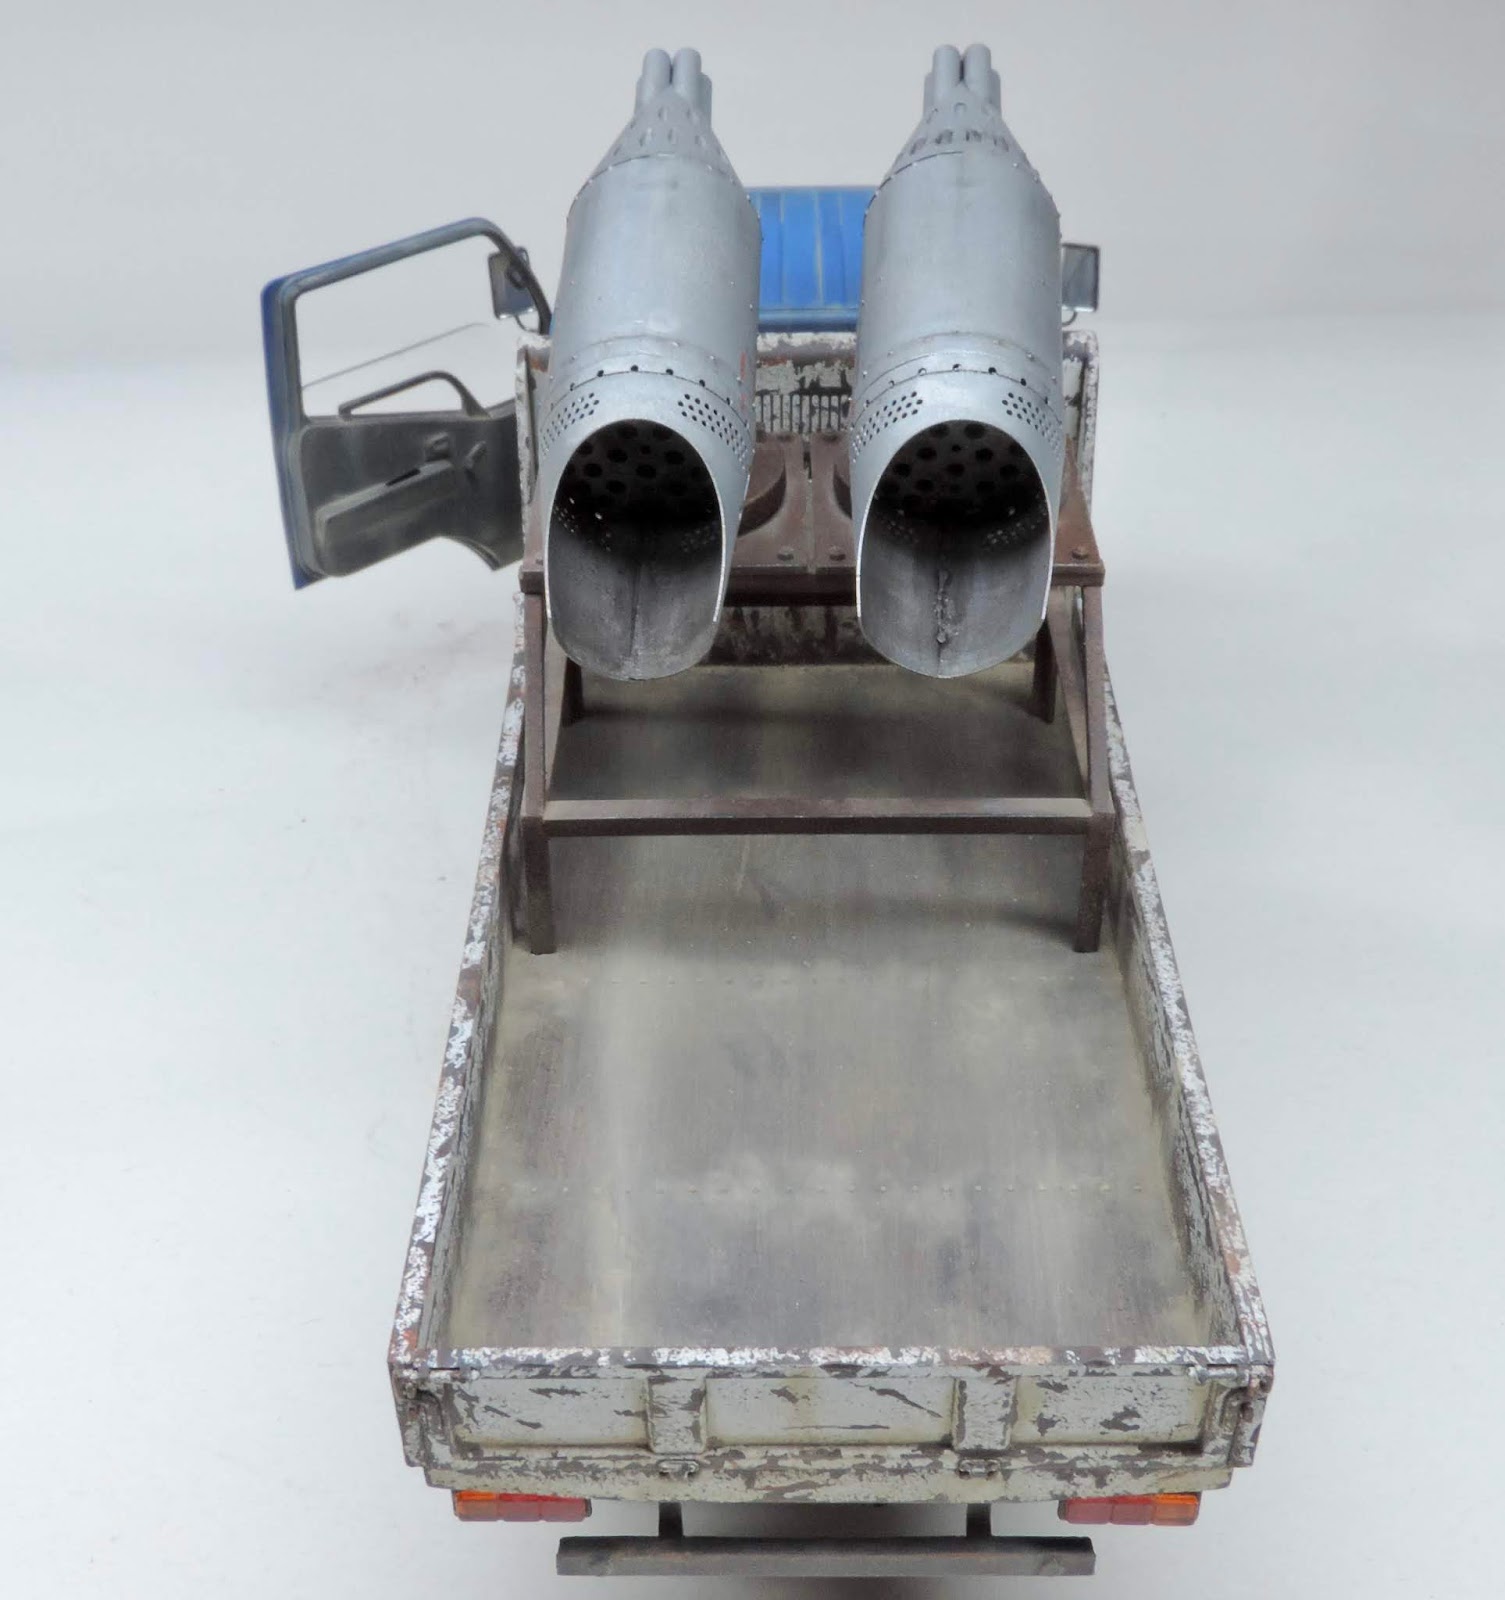
I then fitted the glazing and came across the only iffy part in the kit. The windscreen was not the best fit but with a bit of touching up on the rubbers with flat black and a dusting of pigments it came out fine. The cargo bed was next followed by the rocket frame and mounts. I then used some VMS soot pigment to add some effects to the pods themselves and finished off with some fuel staining around the fuel tank filler.
I'm very pleased with how the model turned out and with the kit itself. I can now start work on a nice little diorama to set the model off nicely.
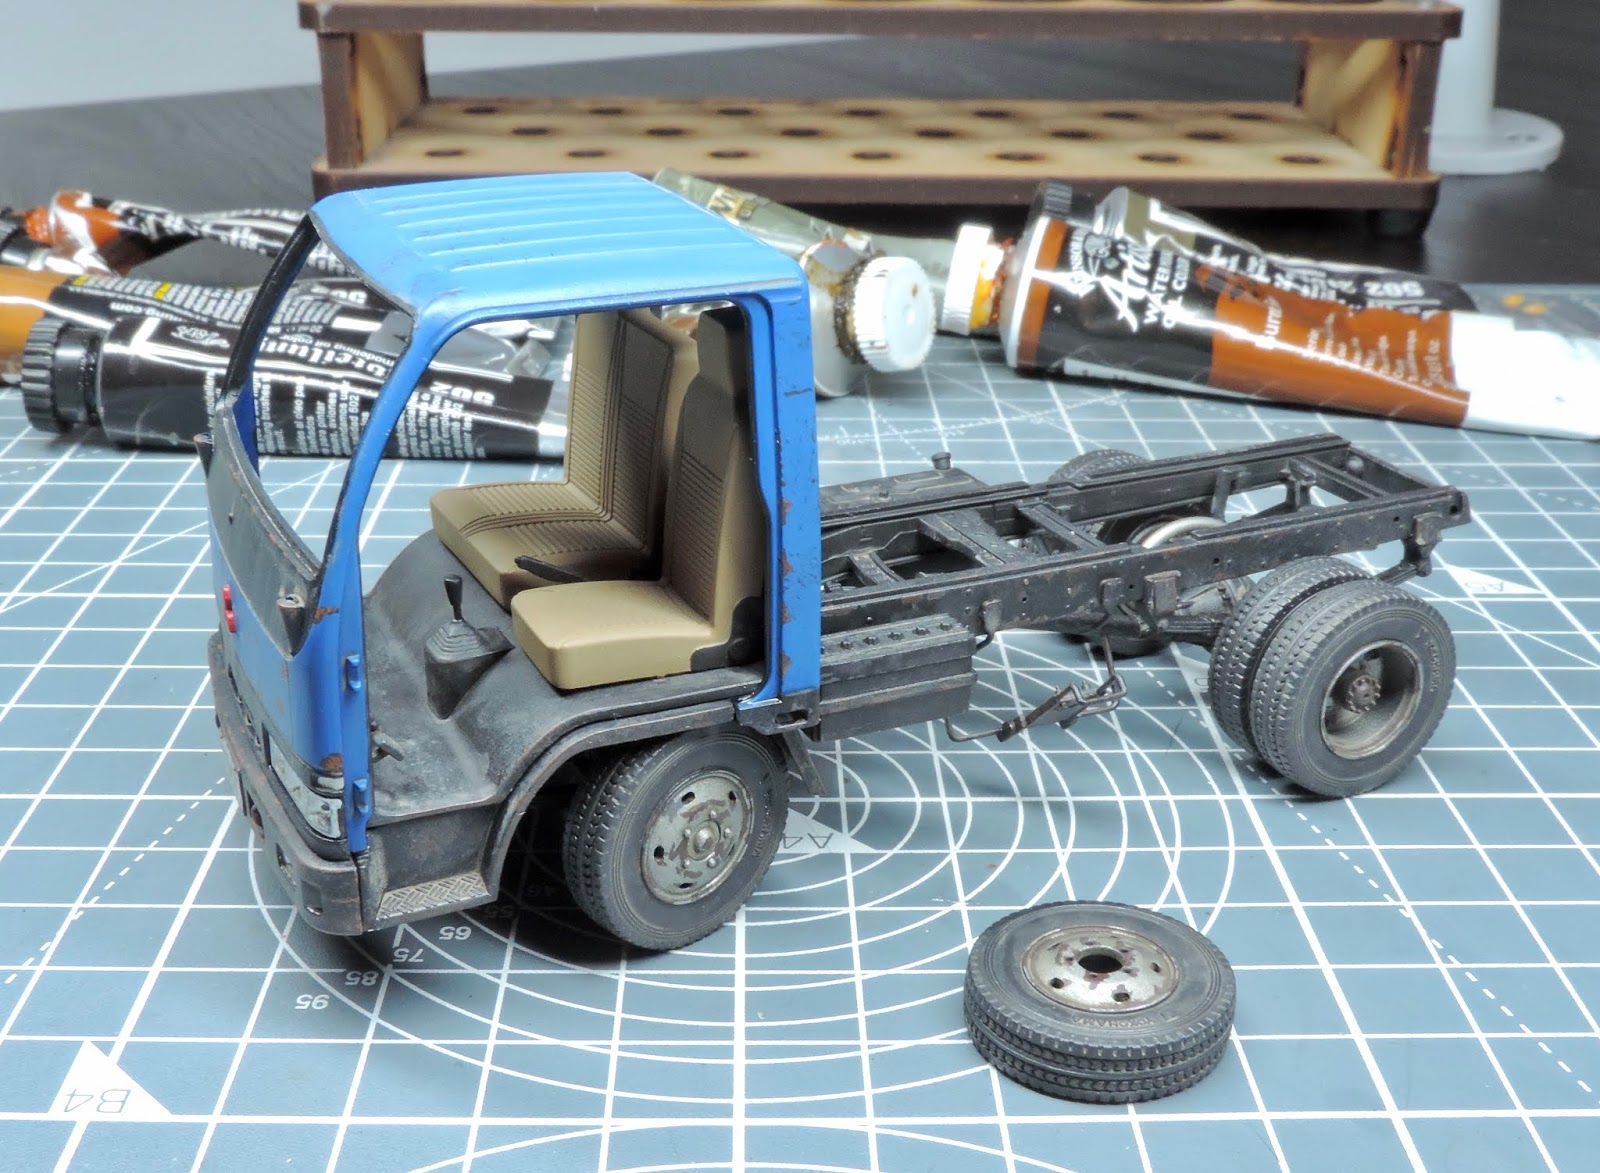
Time now to bring all the sub assemblies together and I've started on the cab area with the seats and steering column glued on and the dashboard, rear view mirror and sun blinds fitted to the cab interior. A light dusting of VMS sand type A pigments added just the right amount of dust to the cab floor and the dashboard. A couple of cassette tapes and a pack of cigarettes helped furnish the dash as well.
I then sorted out some other items for the cab with a couple of bottles, a pringles tube and smoke grenade. The bag was also chosen as I like the idea of using civilian stowage and this was just the job. It's a Dan models item and comes in a pack with a mix of these bags and a couple of sports holdalls. The checkered pattern is supplied as decals and they settle down very well with some Daco strong setting solution.
Finishing off this episode of the build I then added all the lights after painting them with Tamiya clear colours. Now I'll start adding some pigments to the chassis and wheels before assembling the cab and adding the glazing.
I'm now pretty much done on the truck after a few more washes and some oil streaking. I'm very pleased with the results so far. I've decided not to matt varnish the cab as the weathering has knocked back the shine on the satin varnish nicely. It now actually looks sun bleached and with some final pigments later should be spot on.
Possibly the wheels and rear body will get a very light spray of matt just to knock the sheen down on them before final weathering. I've also sorted out the doors and have found I can fit the inner door cards and then install cut down side glazing later on.
The initial filters and washes have now gone on starting with a couple of thin dusty filters then a darker pin wash in selected areas. The details have certainly popped out now and I'm pleased with the look. Lots more to do but this is the fun part!
The chipping is now finished after applying only small amounts of the light rust & yellowish rust. I then attacked the rocket pod frame and mounts whilst I was at it. The number plates where also tackled and here I used the Arabic decals supplied in the kit making up a set of numbers.
A coat of satin varnish went on next before finishing off by painting the lights with chrome from a chrome pen. So far the chipping looks just as I imagined and will be further enhanced with oils in the next few stages.
The fun continues after adding more of the dark rubber with the start of the rust tones going on. I began with vallejo 822 German camo black brown then 302 dark rust again using a combination of fine brush and sponge. I think the trick here is to apply each colour slightly less than the last one so as not to totally cover up previous tones. This helps give a sense of depth to it all.
So the next two colours to go on, 301 light rust and 303 yellowish rust will be more subtle and kept to the edges of chips and scrapes. It's starting to come together nicely and I'm really enjoying this process.
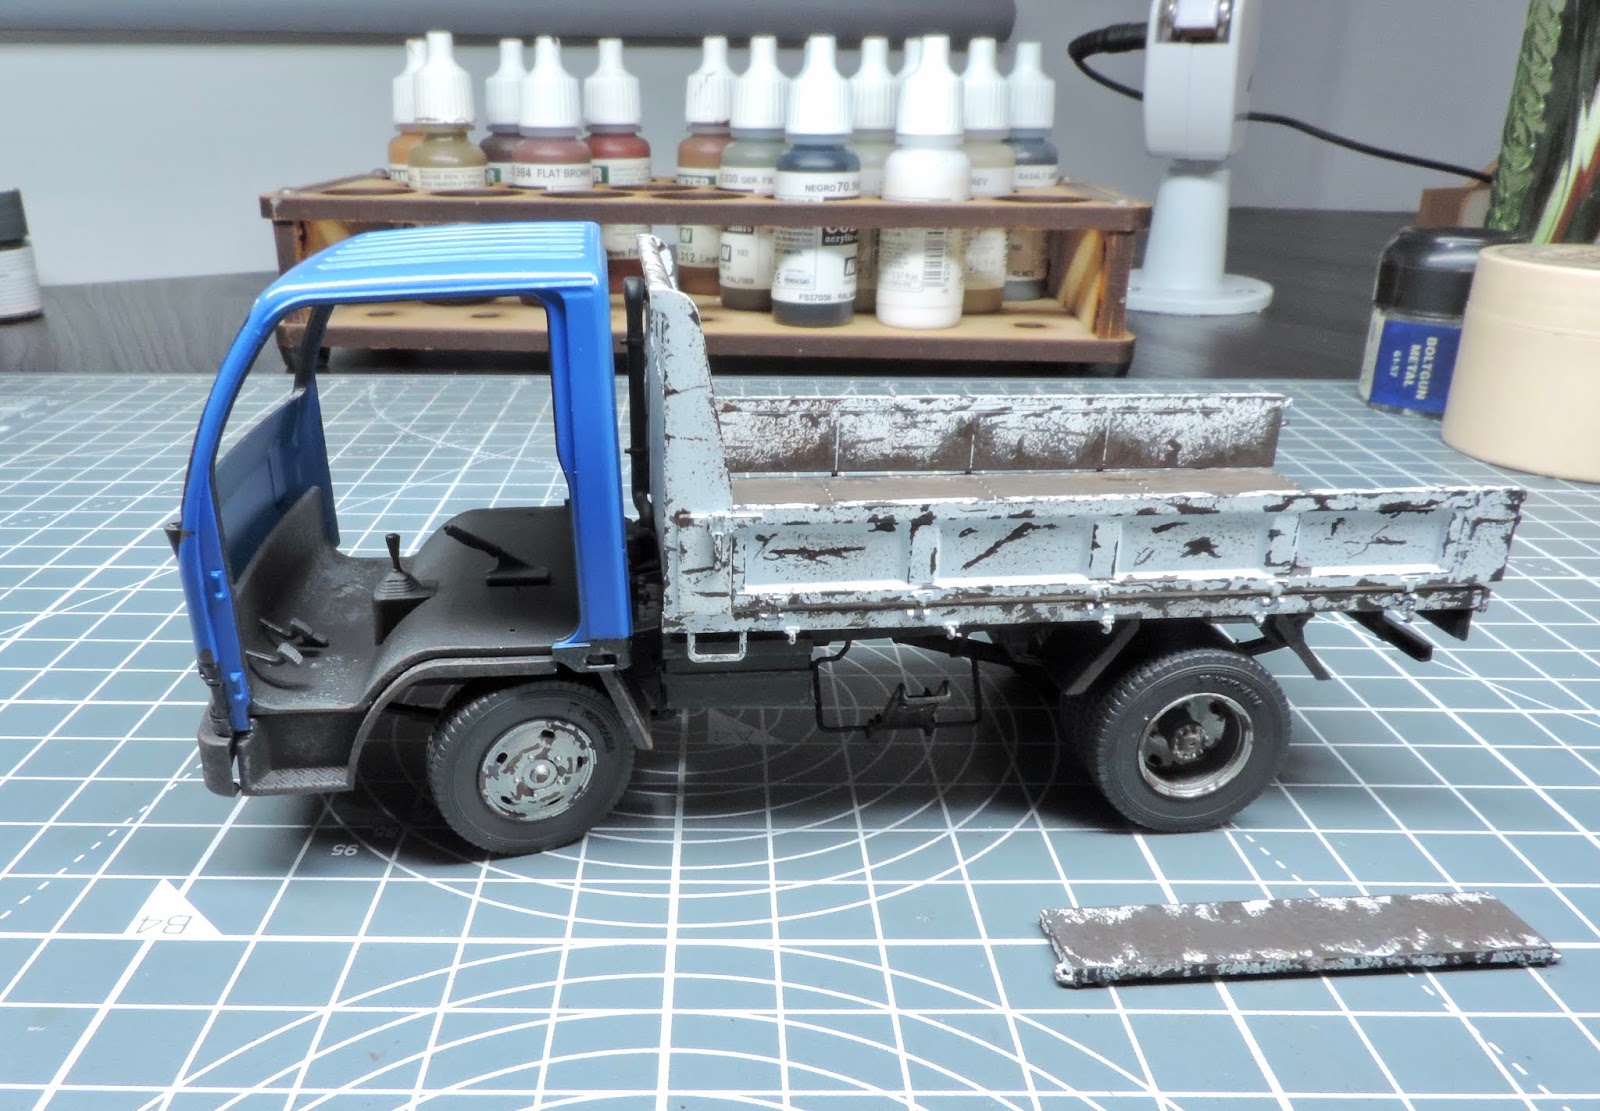
The fun bit now begins with the application of some vallejo dark rubber to simulate primer and exposed metal. I've used a combination of fine sponge and a fine brush to add loads of scrapes and dings to the chassis and rear body. The bed will also get a very heavy application of this colour to show a heavily worn floor.
Once the grey is on I'll begin adding various rust and dark brown tones again with a sponge and fine brush to hopefully give the effect lots of depth. I've also sprayed up the rocket pods using citadel boltgun metal thinned with water.