Sunday 28 February 2021

Comet Weathering Done

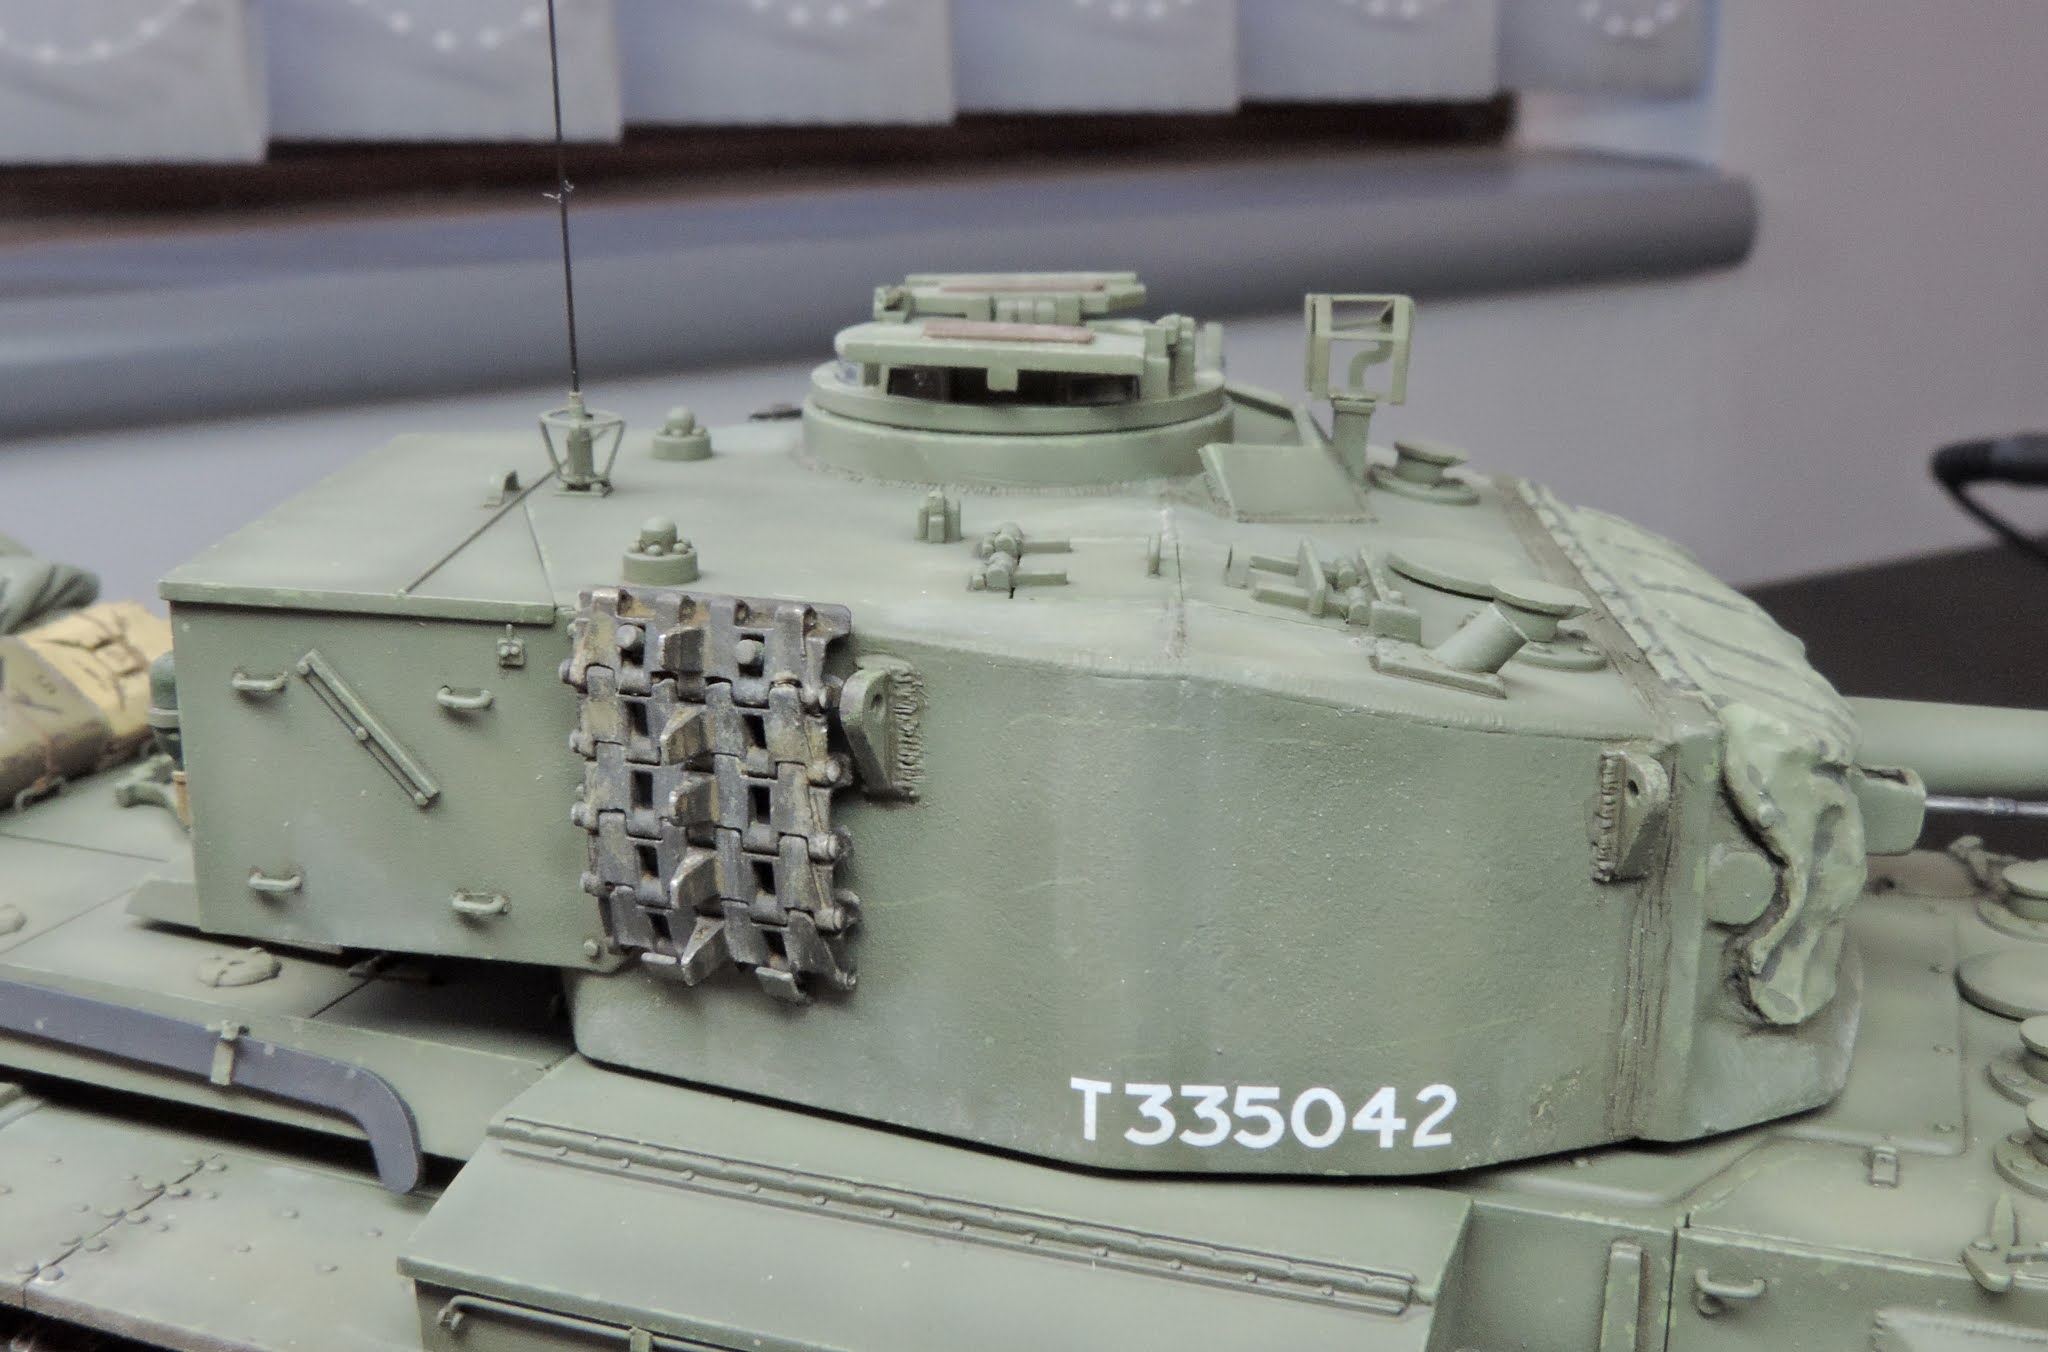
The model is now finished after just a smidgin of weathering on the turret and then all the glazing done. I used modellers world washes for the weathering on the turret which worked really well. This was followed by glazing in the cupola using some scrap clear plastic and black decals for the rest of the scopes. This worked very well and took no time at all. So with just the base and the commander figure to sort out I can now start thinking about the next project.


Saturday 27 February 2021

Comet Filth!

The lower hull and running gear are now all done as are the small side skirts. I'm really pleased with the effects, so much so that I didn't bother with any wet effects liquids as I think it looks fine as it is. The upper surfaces have had some subtle dust added but a little bit more needs to be done here with possibly some earth tones as well. 

The turret is next and I still have to sort some glazing out for the cupola periscopes. I'll also add some glazing to the hull periscopes and will use small squares of black decal with a swipe of gloss. Much easier than trying to paint them.


Friday 26 February 2021

Comet Getting Dirty!

It's all going rather well on the model with one side of the lower hull & running gear almost finished. So far I'm very pleased with the effects as this is something of an experiment in final weathering without pigments. The dust effects may get toned down slightly later once the rest of the model is done and perhaps a quick shot of matt varnish to knock back a few areas which are too shiny. 

So possibly on course to get this finished by the end of the weekend, of course that still leaves the figure and a base to work on but they shouldn't take too long to do.


Thursday 25 February 2021

Comet Final Weathering

After a good few days for the matt coat to cure it's on to the final weathering. I'm using a selection of wilder textured earth products & aqua line effects as well as modelling world washes to hopefully get a damp effect with dry and damp mud on the hull and wheels. I'll add lighter dry mud on the upper hull as well in areas of foot traffic. So far I've only done one side of the hull but it's looking good.


The figure has also had some attention with the leather jerkin first undercoated using vallejo leather then dark umber & raw sienna oils were used to paint the leather. This was then set aside to dry in a warm place for a few days. The coveralls were then painted using vallejo 332 highlight Jap tank crew as a base coat. These WW2 coveralls are made of a canvas material so this colour is perfect as a base. I did think of using vallejo canvas but it was far too dark. 


Monday 22 February 2021

Comet Matt Coat

The comet has now had a matt coat sprayed on after a couple more rounds of washes. Very pleased with the results so now it's just working out how to finish the weathering.  I may dabble in a bit of damp earth and dry mud for some variety on the lower hull. 


Saturday 20 February 2021

Comet Washes & Filters

I've now added some filters and washes again using the Modellers World stuff I used on the type 16. This time I have used a mix of black brown & industrial grime. Very pleased with the effects so far and as you can see the wash is super fine with no grainy finish once dry. All the details such as bolt heads and weld beads have popped out nicely so I'll only add maybe one more wash to the model.


Friday 19 February 2021

Comet Chipping

With the rear tarps and tools now painted I've moved on to some light chipping using vallejo 327 Italian tank crew & white. This has been added using a fine brush and sponge method in areas of high wear. There is just enough there now I think so next will be some washes & filters. 


Tuesday 16 February 2021

Bronco Comet Decals On

The comet has now had the decals added and very nice they are too. At first whilst looking at the decal sheet I thought they would be a problem, possibly with silvering as they didn't look very good. However once soaked and on the model they looked loads better.

I've also weathered the mantlet cover using a dark wash and then some fine dark shadows before dry brushing with a lighter tone. The tarps on the rear deck now need finishing off then I'll add some light chipping here and there before starting on washes etc.


Monday 15 February 2021

Tamiya JGSDF Type 16 Finished

As predicted I managed to finish the base off today so the build is now complete. As usual I added a selection of different lengths of static grass to the base then carefully sprayed this once it had set with my custom grass green colour. Then tamiya buff and deck tan were used to carefully spray the dirt areas allowing a little bit to dust up the edges of the grass.

This was followed by some stone painting using various vallejo tones before a simple sign was made up from plastic rod and sheet. This was then sprayed, a spare decal added then weathered. Finally some shrubs went on to the base before fixing the model in place. 

As ever tamiya give you a superb model to play with but with the addition of a few simple enhancements it really stands out. I've really enjoyed this build as I do love painting JGSDF vehicles so it's always nice to add yet another to the collection.


JGSDF Type 16 Base Building

Work has begun on the base for the type 16 using a picture frame with foam board core and edging. Last night the groundwork went on using plaster followed by fine sand and gravel. The model was then pressed lightly into the setting plaster before leaving it overnight to cure.  

This morning VMS sand & gravel freeze was used to fix these to the base. The plan is to add long grass and shrubs to the edges of the base as well as some sort of gunnery range sign behind the model. I'll start this today and may even have it finished by this evening. 


Sunday 14 February 2021

Comet Paint On

Over the last few days I've painted the model using a mix of tamiya colours to replicate the elusive SCC 15 colour that the vehicle would have been painted in. I used a mix of tamiya colours for this. The ratio and colours were 5 parts XF81, 1 part XF58 & 1 part XF71. With this initial mix thinned it was sprayed on and left to dry. The pictures below have had no colour correction at all. I was very happy with the shade which is a more green olive drab. SCC 15 was the British alternative to US olive drab and was used extensively on British equipment.


I then added some highlights and found XF15 flat flesh worked perfectly for this. I kept it subtle here as I didn't want to wash out the colour too much. Some detail painting was then done before a gloss coat. I'll finish off the detail painting next before adding decals.