Monday 27 December 2021

Challenger 2 Final Tweaks

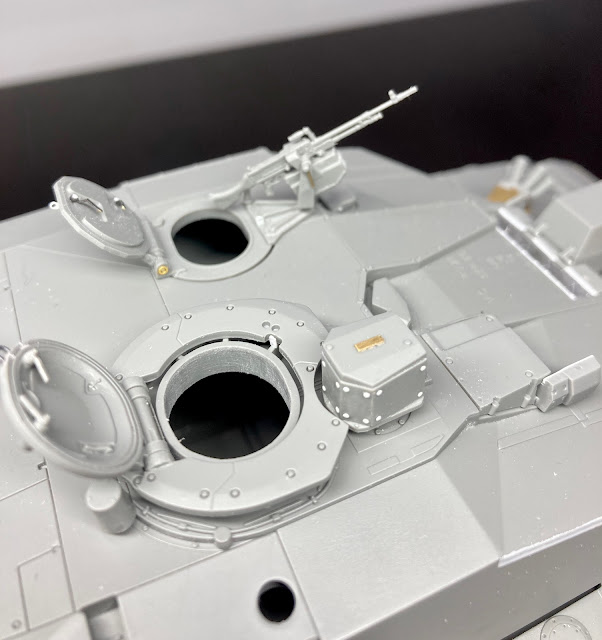
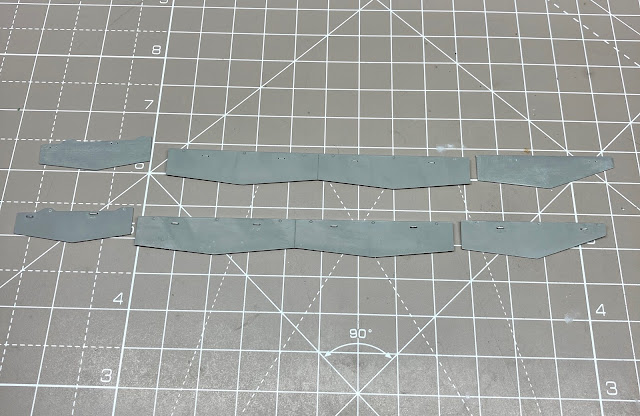
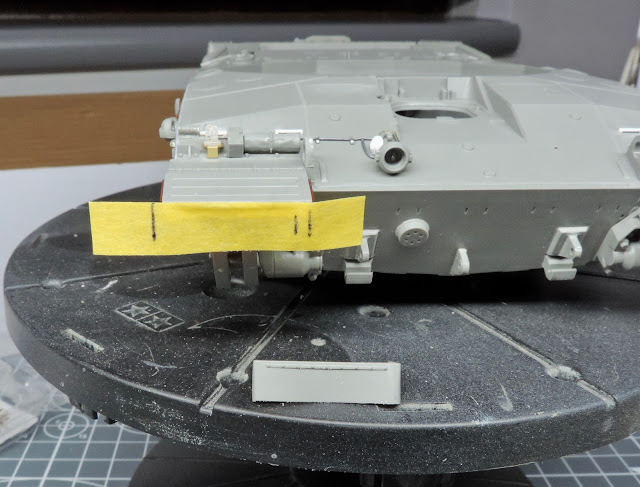
I've now finished the final details for the model and have worked on the loaders GPMG giving it a blank firing attachment and a better ammo box and mount using a accurate armour box and plastic strip. I also added more masking tape under the gun mantlet to hide a big gap, the real turret has a type of cover here so that worked out well. I've also tweaked the side skirts and have added a strip of plastic card on the rear section. As I plan on this section being mounted in the raised position I was not entirely happy just fixing it to the hull. 

On the real vehicle there is a thin strip of metal running along the entire side of the hull above the skirts and mounting points so this thin strip at least gives the impression it's there. Likewise I thinned the top edge of the centre skirts down slightly as it looked too wide. A small detail I know but one I wanted to sort out.  

So with everything now done bar the antennas I've looked at crew figures and yes you've guessed it will probably have to adapt some existing ones to suit. I've got the nice miniart British AFV crew but they are only wearing the tank coveralls and no body armour. Almost every tank I've seen at work has the crew wearing the Virtus body armour especially on exercise and as all available figures of modern British crew figures have osprey armour or none at all I will need to get the magic sculpt out! 


Friday 24 December 2021

Challenger 2 Almost Done

Just a few more bits to do on the model now. I've added some extra detail to the commanders & loaders hatches and replaced the overscale bolts on the commander's independent sight. The side skirts have had some attention and here I removed the front section and then thinned this down for a more in scale appearance. The rear plate needed the same as well. Some lead wire handles have also started to be put on. 

I now only have the loaders machine gun to finish off & antennas to fit. Hopefully they will arrive soon as I'm itching to paint the beast!


Wednesday 22 December 2021

Challenger 2 Turret Nearly There

The turret is now almost finished with the addition of the smoke dischargers and a new mantlet rear cover which I made from lead foil & plastic strip. I've also glued the barrel in place at this stage as the locating pin is rather small. This way I get a good strong bond, something which would be difficult if you add the barrel after painting. 

A few more bits left to do on the turret now such as a blank firing adaptor for the GPMG and then I can start work on the side skirts.  


Monday 20 December 2021

Chally Turret

Working away at the turret now and first up I filled some areas that had small recesses , these should be flush or almost so with the rest of the sides with plastic strip. This was then sanded down flush. Next I added some strip to the edges of the bin lids and again sanded them down. This helps hide a slight flaw on the commanders side and also tidies the edges up nicely. 

Once that was done I added a very slight raised area to the previous filled sections using tape as an edge then heavily thinned Mr surfacer. The gunner's primary sight has had some work with more to do & I made up a flashing beacon using an accurate armour one. The loaders hatch has had new locking handles added from spare etch & the barrel is all made up and a bit of extra detail added.


Saturday 18 December 2021

Challenger 2 Turret Next

I've now finished off the hull with just the side skirts to sort out later. The front splash plate is just fixed temporary for the pictures, I might make a new part later as I'm not entirely happy with the etched kit item. On the real tank there is no ribbing or raised areas, it's just a plain sheet of metal. 

Working on the turret this morning which is made up of a lower and upper section plus three vertical sections for the sides and rear. There is quite a bit if flash on these parts so some careful sanding and fitting ensures a good mating surface. The mantlet was also built up and here I made a blank firing adaptor for the co-ax using punched plastic card. Very happy with it even though it was extremely fiddly to build.

Once all parts of the turret fitted correctly I deviated from the instructions and glued the side sections to the lower turret section instead of the upper one. I found this much easier to get a good fit. Tamiya quick setting glue was used for this.


Friday 17 December 2021

Tis The Season..........

Yes it's time for the festive message & round up of the year. Again a pretty poor one for modelling shows with Stonehenge modellers only attending two shows, Avon & Yeovil. However they where both excellent and in a way made up for the lack of shows we usually attend. The biggest blow was having yet again to cancel our Belgium trip in October, not least as it's a great social event for us but also it's just so much fun. Fingers & toes crossed we make it next year.

On the bench I managed to finish nine builds this year and that's with a serious loss of mojo during the last few months. The Comet & AMX-30 are the stand out builds for the year, I thoroughly enjoyed them. Next year I'm planning on changing my diorama bases which will involve utilising foam board. 

I want to try and make more distinct bases that will be custom made to each individual model instead of relying on picture frames and their limited sizes. This will also help with my current display issues and hopefully free up more space in the cabinets. I'm also thinking very seriously about recording my builds and posting them on youtube. Still some research into this but the idea is forming!

Work wise it's again been a busy year and also an interesting one with plenty of opportunities to watch the British army in action & enjoy the fantastic wildlife & scenery on Salisbury plain.

So I wish you all a great Christmas and thanks for all your kind comments over the year. I hope you've enjoyed the blog and my witterings! Finally I'll leave you with Dita in suitable festive garb, enjoy!


Challenger 2 Tow Ropes & Front End

Making my way to the front of the model I've now added the tow ropes replacing the kit string with 0.90mm copper wire. I always find adding certain types of tow rope during the construction far easier than trying to add them once the model is painted. I can still mask off easily enough as the ropes are not fixed to the three holders along each hull side.


Onto the front of the hull now and here I've added some conduit to the light using lead wire and lead sheet for the retaining clips. I like the fact that the fire extinguishers are molded with a hessian covering them, something very common on these tanks that I've seen in my day job. 

I've also experimented with new front mud flaps as the kit ones are overly thick. So I've doubled over some tamiya type tape and then glued to the front. Once cut to shape some plastic card and punched bolts finish it off nicely. I think it looks much better than the kit part.


Thursday 16 December 2021

Challenger 2 Rear Deck

With the second light guard quickly knocked up I've moved onto the rear deck. There's loads of parts to add here such as all the hinges for the deck sections and handles. I added a bit of improvement by removing the solid centre deck handles and replacing with plastic strip. The stowage boxes build up very nicely and I added a couple of accurate armour padlocks and breather pipes. 


Tuesday 14 December 2021

Challenger 2 More Details

The second drum has now been modified and this time I've gone for a slightly different configuration. The rear mud flaps have also gone on, they are quite thick so some sanding down on the inner surfaces is of benefit for a more scale look. Finally I've added the clear rear light lenses and made up new guards using brass wire as the kit supplied guards are a pain to clean up and are overly thick.