Tuesday, 10 January 2012

A Happy Outcome.........

Oh I do love the internet! after sending an email to Zvezda's worldwide representatives, Hobby Pro Marketing GmbH, I received a very nice email from Pepi Zelger telling me that they are aware of the problem and that they would send me a replacement part, thanks Pepi you are a star! attached to the email was also an updated paint guide to replace the inaccurate kit supplied one. This will be available soon to download from the Zvezda web site.

So onwards and upwards! I have started building the hull components and replaced the nylon mesh for the engine decks with some scrap etched parts trimmed to fit for better detail as well as adding some details to the exhaust area. The bottom hull had a few ejector pin marks to sand out and a drop of Mr Surfacer here and there to hide those marks I could not sand.


Monday, 9 January 2012

A slight hiccup!

More work has been done on the turret which is now almost finished however there is a slight hiccup! Part F103 is missing off the sprune in my example, it looks like it has not formed correctly in the mould. Perhaps this is just my kit or maybe others have the same problem, by the way I am in the UK. Unfortunately the part is for the commanders cupola mounted machine gun and is quite crucial as it supports the machine gun assembly.
Here is a picture of the missing part,


I would advise anyone with the kit to check for the part and if missing contact your supplier/Zvezda as I have. Bit of a pain but I hope this is only an isolated case.

One word of caution regarding the side sensors next to the cupola and loaders hatch, part numbers D51 and clear part number E15, the fit is very tight and I nearly split part D51 whilst trying to fit the clear part so my advise would be to leave E15 out if you want the sensors open and fill in the lenses with micro kristal klear or similar later on. Here are some pictures of the completed turret minus a few items and the machine gun,


Sunday, 8 January 2012

T-90 Turret Tales

As was promised yesterday here is an update on the T-90 build, construction starts as per the instructions with the turret and I would recommend that you take your time and test fit the major turret components before committing to glue to ensure a good fit. This is defiantly NOT a fast build due to the many small parts which need to be fitted but the overall detail is very nice indeed.

As you can see I have added some cables using lead wire and also added a blue tinted lens in the commanders sight as this is quite visible on the real vehicle. A few bolt heads have also been added here and there. I would strongly recommend a quick web search for good walk-around pictures as well to help you with adding extra details.


I have also found that the plastic used is quite soft so care needs to be taken when removing some of the smaller parts from the sprunes.

Saturday, 7 January 2012

Terrific T-90!

My Zvezda T-90 arrived today and boy is it a fantastic kit! The level of detail and finesse of the mouldings is truly stunning. I have spent most of the afternoon drooling over the parts and can only find a few ejector pin marks that need filling on the lower hull sides. I am particularly impressed with the fine details on the model and think under a coat of paint it will look stunning.


So after clearing the bench I am about to start so watch this space for updates soon!

WMIK Figure

I have now completed the figure to go with the WMIK he just needs some dust on the boots and lower trousers but this can be done when I do the base. I do like the laid back pose defiantly a British squaddie!


Thursday, 5 January 2012

Coming Together Slowly but Surely!

Well I have had a surge of interest in completing the WMIK and have now added the stowage to the model. I also added straps etc. for the bergens using tamiya tape. The final steps are very close now! just a dusting of tamiya buff and final pigments for the last bit of weathering.


I have also made a start on a figure to go with the model, this is an old accurate armour item which I think is still available. Painted using various custom shades of vallejo. The figure will go nicely with the WMIK on a small base.


I am keen to get this finished as I have the new Zvezda T90 MBT on the way and cannot wait to get into what looks like a fantastic kit.

Monday, 2 January 2012

Happy New Year!

A very happy new year to all my blog watchers I hope you all had a very pleasant festive season. As I am now into my fourth year of writing this blog so I am hoping that this year will see a much better output of models(I only managed five last year!)not including commission builds.

Today seemed like a good day to actually sort out the modelling room so with duster, polish and the hoover I managed to blitz the den in a few hours,as well as sorting out all my tools,paints and accessories, most satisfying although I guarantee it won't stay this tidy for long!

I also took a long hard look at the stash and had a bit of a cull, this involved some rather lengthy discussions with myself in deciding what I would actually build and what would inevitably continue to gather dust under the bench or in the loft. So the large pile in the second picture is now on ebay so I can use the funds to purchase new models I will probably build at a later date!


Wednesday, 21 December 2011

A Festive Message

Well the Christmas period is again upon us and guess what? I still have not finished the WMIK! I really must get on with it as there are so many other models I have planned for the next year and as usual the list is getting ever longer! I have a bit of leave in January so I am hoping to get my finger out and finish the damned thing.

Thanks to everyone who visited the blog over the year I hope you have enjoyed my posts and it's given you some inspiration and ideas for your own projects, I have certainly enjoyed my modelling year and hope next year will be even better. So enjoy the festive season wherever you may be.
Pete


Tuesday, 29 November 2011

Bits & Bobs

The WMIK has now had it's matt coat and all the lights have been added, as usual near the end of a project another disaster occurred this time in the shape of one of the rear lights disappearing into the ever hungry jaws of the carpet monster! A new light was fashioned from clear plastic rod so I expect the original part to turn up just as this project is finished!

All the stowage has also been painted and I have used accurate armour items including their modern snacks set plus a couple of soft drinks cans to add some colour and variety to the finished model.


Friday, 18 November 2011

WMIK On It's Wheels

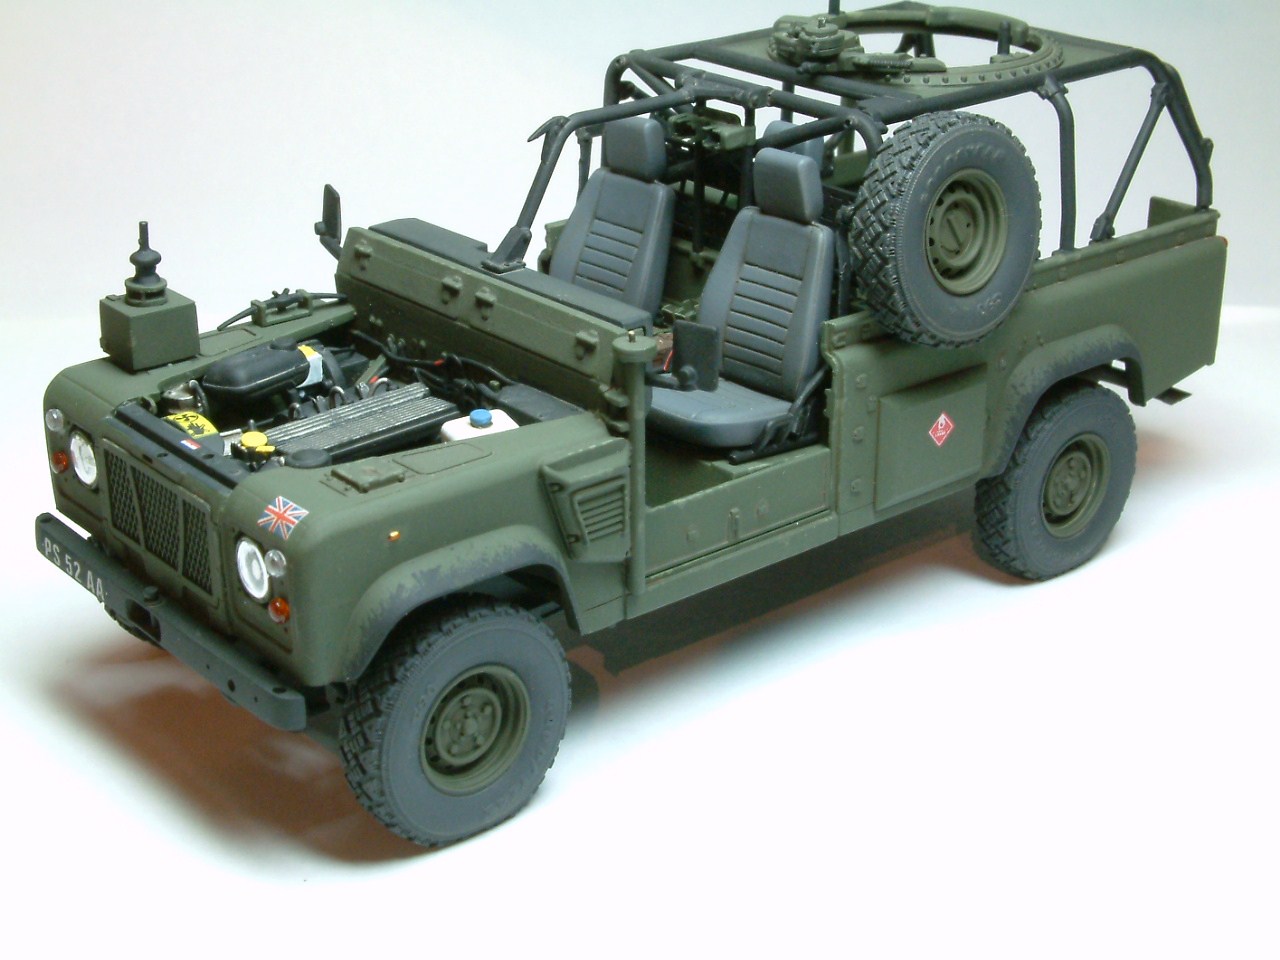
Well the glacial progress of the model continues! I have now added a little bit of paint chipping as well as some pin washes and a couple of filter coats and added the main body and cage to the chassis. The next steps will be a matt coat followed by a generous application of pigments. I am finding this a difficult project to finish due to the many elements that need to come together to finish the project.

I have not even started on the stowage or figure yet let alone the base!! Maybe it will be finished by Christmas! However I am pleased with the results so far and really like how the engine bay has turned out.


The acquisition of new kits however is far from glacial let me tell you! with the new Italeri 1/48th Hurricane now residing under the bench as well as a Hobbyboss Landrover Defender hardtop, a Meng models pickup truck with equipment and a rather happy find on ebay, a Dragon united nations BTR70 with ukrainian peacekeepers all in 1/35th scale.

This weekend I will be attending the BMSS show Bugle Call in Bath with my club so do come and say hello if you are there.

Tuesday, 25 October 2011

Painting Progress

I have now almost completed the detail painting on the model. All that is left to do is paint straps and stowage which will be done later. Decals are also on and the model has had a coat of klear ready for the weathering. I used Acher details for the ammo boxes and these look superb, you can even read the writing! The union jacks are extras not supplied in the kit and added just to make it slightly different.


The light lenses are currently receiving some attention with the rear of the lenses painted silver and tamiya clear colours to finish them off. For the headlights I will be using some discs of silver foil to represent the interior of the lights.

Thursday, 20 October 2011

At Last! Some Progress!!

Hurrah! I hear you cry at last an update! I have finally managed to get back to the modelling bench after some trials and tribulations plus a slight loss of the old modelling mojo but as Austin Powers would say,"I'm back baby, yeah!!"
After a nice primer coat I have used tamiya NATO black, flat black and field grey for the main colours and them started adding all the details using vallejo colours. The seats are painted using tamiya dark grey.


It's all horribly clean and tidy at the moment but never fear this will soon change!