The pace of the build has slowed slightly due in part to the fiddly PE and having to add a load of tiny lugs to the hull sides. The bracket on the hull roof was a bastard to bend correctly but I got there in the end. Of course once shaped it would not fit the lugs on the roof so I just shaved them off, fitted to the underside and glued in place.
The lugs along the side of the hull are really tiny and you need to be ultra careful removing them. Here I found that they should have a recess in the ends so I drilled each one out on the sprue. A tedious and mind numbing task but also strangely satisfying at the same time!
Thursday, 30 May 2019
Wednesday, 29 May 2019
Trumpeter Italian Puma 4x4 AFV
I'm now adding the detail parts and have been bashing away at the rear of the model. The winch assembly was a fiddly bugger to assemble due to all the etched parts but VMS flexy 5K CA worked it's magic for me. Quite a bit of time was spent getting it all lined up properly. Strangely the kit has no tow rope so I used some 0.40mm brass rope from eureka XXL which worked perfectly.
A bit of white work also went on to add missing details. Later I'll have a go at adding some anti-slip to the front of the hull. I'll use the VMS hull tex air for this. I've tried this a couple of times on previous models with mixed results however I think I know what went wrong so hopefully it should work this time!
A bit of white work also went on to add missing details. Later I'll have a go at adding some anti-slip to the front of the hull. I'll use the VMS hull tex air for this. I've tried this a couple of times on previous models with mixed results however I think I know what went wrong so hopefully it should work this time!
Tuesday, 28 May 2019
Next Project On The Bench
With a slot now opened up in the build schedule it's time to start another build and I've chosen Trumpeter's rather nice Italian Puma 4x4 AFV. This ones been in the stash for ages and I actually forgot I had it but with the cave refurb it resurfaced! In the box I also discovered a couple of figures from Djiti's productions.
I've made a start on the kit and apart from some fettling to get the lower & upper hulls to fit snugly & deepening the door and engine recesses it's all going together very well. It's also easy to turn the front wheels for a more interesting display.
I've made a start on the kit and apart from some fettling to get the lower & upper hulls to fit snugly & deepening the door and engine recesses it's all going together very well. It's also easy to turn the front wheels for a more interesting display.
Monday, 27 May 2019
Takom Finnish SPAAG Marksman Complete
I've now completed the build and base after a monster session at the bench last night and most of today. It's great to get back into the swing of things! As you can see I've added some empty shell casings to the base to give the viewer an idea that the vehicle is on the ranges.
For the casings I used some accurate armour rarden shells. although 30mm they were the only thing I could find that would work, I think they're close enough to 35mm in this scale to not matter. Painted silver with a drop of soot on the drilled out ends they work pretty well I think. The groundwork is based on various youtube videos I've watched of the real thing firing. Very spartan and with little vegetation so that's what I have tried to replicate. As ever the base was finished off with VMS pigments before the model was fixed in place.
I'm really pleased with the end result and thoroughly enjoyed this kit from start to finish.
Sunday, 26 May 2019
Base Bashing
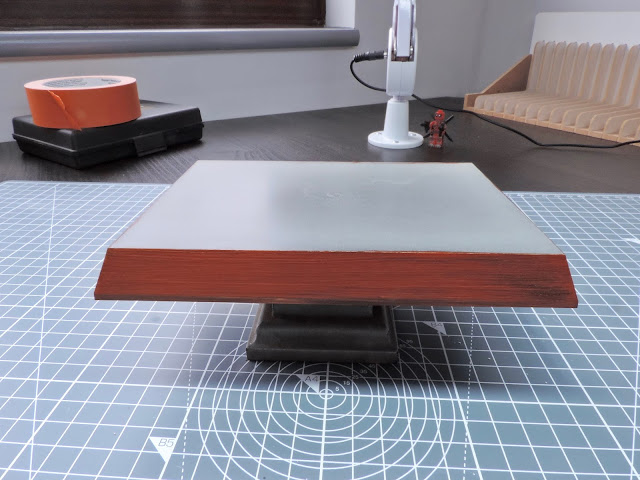
Today I've been working on the bases for the marksman & ambulance. I've used tamiya plastic items here both small and large as they are very sturdy, weigh very little and are cheap. The marksman base has now had filler, sand & gravel and once dry a blast of tamiya flat earth.
I've made up poles and a post from plastic card and painted accordingly. I've seen both whilst watching videos of the beast firing so thought they would look good on the base. Over the next few days some grass tufts & weeds will be added before finishing off with pigments.
The ambulance base has been primed in desert yellow, then raw umber & burnt sienna oils were brushed on then removed with a dry brush. The result is a very convincing wood effect.
Saturday, 25 May 2019
Elefant Figure Painting
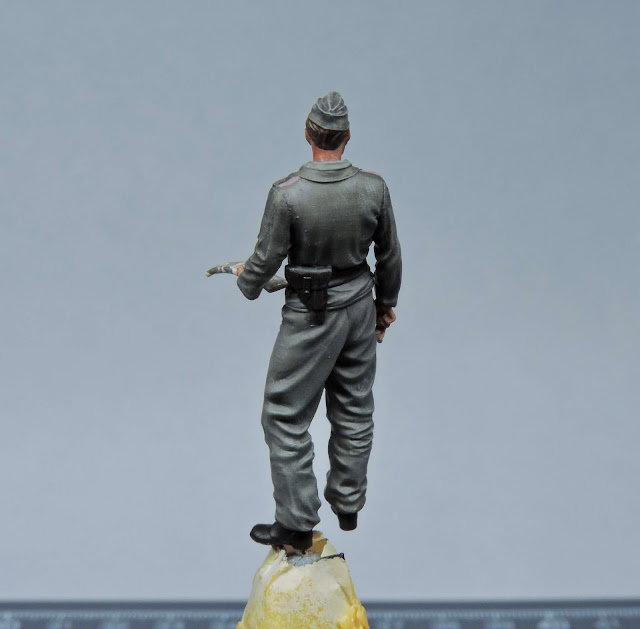
Today I've been painting one of the figures I have for the elefant build. I've decided to just use one figure and this one is my preferred choice for the build. As ever vallejo colours were used and in this case the main uniform colour was 830 German field grey.
This was darkened with black for shadows & highlights were added using panzer aces 338 highlight German field grey. The detail on this figure is phenomenal, remember it's only 1/48th scale so it's really impressive. Thank god for optivisors though as I doubt I'd ever be able to paint something this small without one!
This was darkened with black for shadows & highlights were added using panzer aces 338 highlight German field grey. The detail on this figure is phenomenal, remember it's only 1/48th scale so it's really impressive. Thank god for optivisors though as I doubt I'd ever be able to paint something this small without one!
Friday, 24 May 2019
Model T Figures
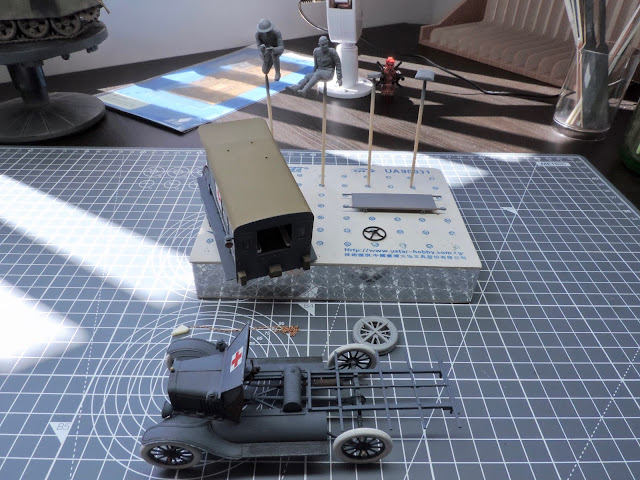
I've just finished off painting the figures for the ambulance. I'm very pleased with how they came out. I used vallejo colours apart from the boots which were painted using oils. I also added a wheel chock to the chassis as per my references. So now I'll let the oils dry for a few days before starting on the final weathering.
Thursday, 23 May 2019
Model T Ambulance Canvas Painting
As the putty dried faster than expected I've now painted it using vallejo panzer aces 314 canvas then added lighter and darker acrylic washes for a bit of variety. The figures have also been painted using panzer aces 317 British tank crew as a base colour & the first shadows have also been added.
I'm pleased with the canvas as it's slightly lighter in tone than the roof which adds a nice bit of contrast. I've also decided to use acrylics for the final weathering on the model for a change as there are a couple of methods I'd like to test. More of that when I get to it!
I'm pleased with the canvas as it's slightly lighter in tone than the roof which adds a nice bit of contrast. I've also decided to use acrylics for the final weathering on the model for a change as there are a couple of methods I'd like to test. More of that when I get to it!
Wednesday, 22 May 2019
ICM Model T Ambulance Resumed
With the marksman just waiting for a base & the elefant main colour curing it's time to resume the work on the ambulance. I've started by adding some duro putty to the spare wheels & also made up a canvas flap for the rear. It will have to cure for a day or so before painting but that gives me time to start on the figures.
Monday, 20 May 2019
Takom Marksman Near The "Finnish" Line
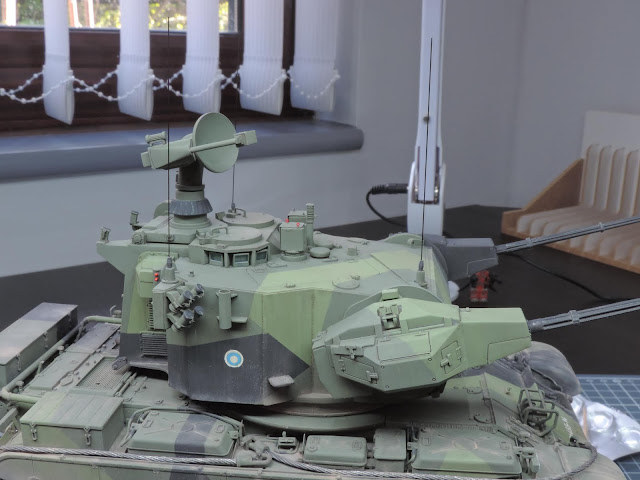
Today I've sorted out the independent sights on the turret using some clear plastic from a figure box and fitted the optics. Very pleased with these, a big improvement that was easy to do. The antennas have also gone on so now I'm just waiting for a base to arrive to "Finnish" this build off!
Sunday, 19 May 2019
Finnish Marksman Almost Done
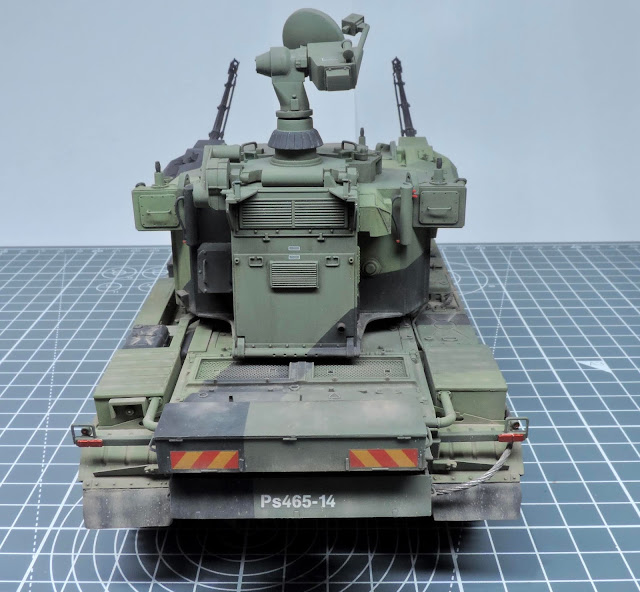
I've now finished off the pigments stage of the weathering and will probably add a little bit more dust to the turret roof using some acrylic wash heavily thinned. Everything bar the two turret sights is now fixed in place as well. With the gun barrels in place it really is an imposing beast!
Also I can now accurately gauge how big a base I need to display the finished model. I think one of the tamiya long bases should fit the bill nicely.
Also I can now accurately gauge how big a base I need to display the finished model. I think one of the tamiya long bases should fit the bill nicely.
Subscribe to:
Comments (Atom)


