Work has now started on the Somua colour scheme after a coat of primer and here I started with some pre-shading using flat black. I've started spraying the lightest colour first which in this case is tamiya XF-21 sky. I've then added some white to this and then went back over those areas to give some highlights and variation in tone.
The top cupola was then masked with silly putty and XF-23 light blue was applied. I'm using the suggested tamiya colours on the model all be it slightly darkened or lightened as I go. All the colours will get the highlighting treatment for some variation. So far it's looking good although this will be quite a masking marathon!
I primed the model yesterday so today got the paint out and sprayed the model As usual I used tamiya XF-65 field grey for the base colour then lightened this gradually with XF-15 flat flesh. The canvas received a 50/50 mix of the two colours to give a faded look. Once it's had a couple of days to cure I'll start the detail painting.
Here's the latest on the bench which I started on Saturday whilst waiting for other stuff to dry etc. As you can see I've finished the bugger already! I did add and replace details along the way but as it's a small scale jobby it really didn't take any time at all.
The Airfix kit is the old JB models version re-boxed and is a really nice little kit. The Bedford is such a familiar vehicle to modern British fans & one I've had on my wish list for some time, all be it in my normal 1/35th scale. However as I don't happen to have an Accurate Armour Bedford kicking about the man cave this fits the bill nicely.
I'm going to put this in a little diorama and have found some figures which should work well. They are a group of soldiers in relaxed poses having a brew, as you do. The time scale will probably be BAOR (British army on the Rhine).
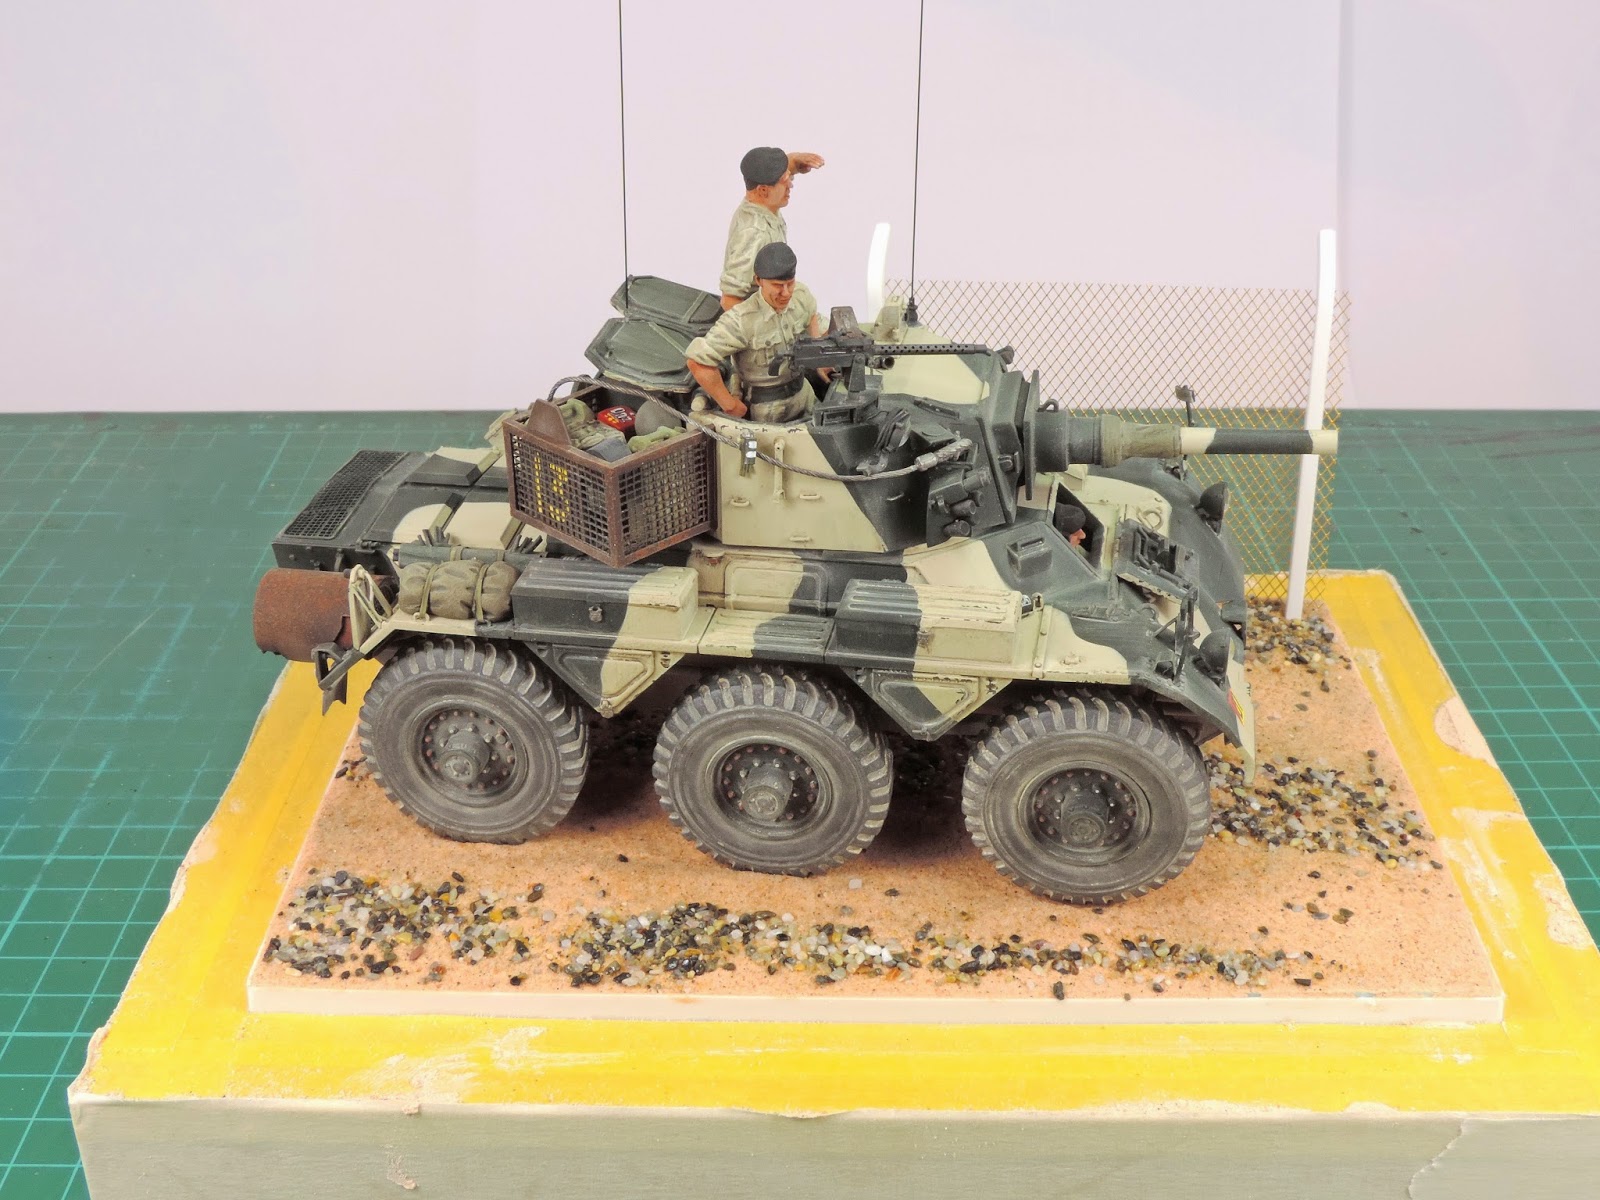
Over the last couple of days I've been working on the base for the Saladin and have now completed the build. The fence & posts came out very well and provide a really good backdrop to the Saladin. The final item to add was a small cap badge for the Queen's Dragoons Guards to the base. So there you have it a Saladin Circa 1967 in Aden.
I'm extremely pleased with the final model and I think that the dragon kit with a bit of work can be made into an excellent replica of the real vehicle.
Today also marks my 500th post since starting the blog back in 2009. There's certainly been a few models along the way as well as a few trials and tribulations but it's been great fun writing and also receiving feedback and support from some of you. It's also been great meeting people at shows who read the blog.
So here's to the next 500 and thanks to everyone for reading the blog and supporting it. I hope you've enjoyed it so far!
Well that didn't take very long did it? The turret was a breeze to build and I just added three lifting hooks and some bolts to the cupola. The figure is I think one of the best I've seen from Tamiya. He fits the turret beautifully and I really like the pose. Finally I added the chains to the rear hull and went over the model with Mr surfacer. The tools will be left off the model until after painting so I can add some straps to secure them to the hull.
So that's the build phase complete and I must say this is one of the best models I've ever built, pure quality of parts, ease of assembly and great details plus a nice simple & quick build really make this a great kit. Out of the box she's a cracker but with a few simple enhancements she's a stunner!
I've now finished detailing the stowage bins, nothing too hard or time consuming but I think it makes a big difference in the appearance. I've also finished up the hull assemblies by gluing the upper and lower parts together then adding all the small parts. I hollowed out the horn and added some bolts to the shroud over this. A spare bit of mesh was also added to the headlight shroud as per my refs.
Finally my two favourite parts of the kit were built up, these being the exhaust and rear tarp. Both are really well designed and exhibit great details. The tarp simply pops onto the model and fits like a glove. Both parts will be left off the model until after painting. The hull join line will get a swipe of mr surfacer to blend it all together as will the various lifting hooks and other fittings.
This is such an enjoyable model to build and quick too! I expect that I will have the turret all finished by the end of the weekend.
Moving onto the base now and here I've used a small Ikea picture frame which has had the edges lined with plastic card and then some polystyrene added for the base of the groundwork. I've come up with the idea of displaying the model on a perimeter patrol and am using the mesh fence from an MMK set.
As I wanted to use the supplied posts for another project I made up a couple of new ones using square plastic rod. The set provides the mesh, posts and barbed wire to top the posts. With the model in place it looks very good I think.
Today here in the England we celebrate St George's day, well some of us do! There's actually a campaign to promote this feast day and be proud to be English! Something I think a lot of people are afraid to do or admit to these days.
Well my flag's proudly displayed outside the house and I plan on having a beer or two in celebration this evening because I am proud to be English!
For those interested here's the website all about St George's day,
St George
Here's the Achzarit all finished after a dose of pigments, again I used the mix from the Saladin but added some Lifecolor Golan dark earth pigment to the mix. The crew, guns and an antenna made from plastic rod went on and it's done. I was intending to put this on a base but due to my cabinets being jam packed with models I'll leave it as is for the time being.
Must sort out the display cabinets or probably buy a new one!